Best practices for content sharing in Power BI
Introduction
The ability to share content quickly and easily is a key strength of Power BI. There are however several different ways in which content can be shared and, when deploying Power BI at enterprise scale, it is very important to understand the differences between each of these sharing methods.
Within this article I am going to demonstrate the three main methods of sharing in Power BI. I will briefly discuss the advantages and disadvantages of each and I will provide you with my personal thoughts and recommendations.
"In my opinion only ONE way of sharing content is considered best practice within an enterprise context"
To help convey my message I am going to use some short, animated GIFs. I've set up a brand new Power BI tenant and created two test accounts the associated directory. One account will be my content producer while the other will be my content consumer.
(A) Sharing Method One: Sharing content directly from a Personal Workspace
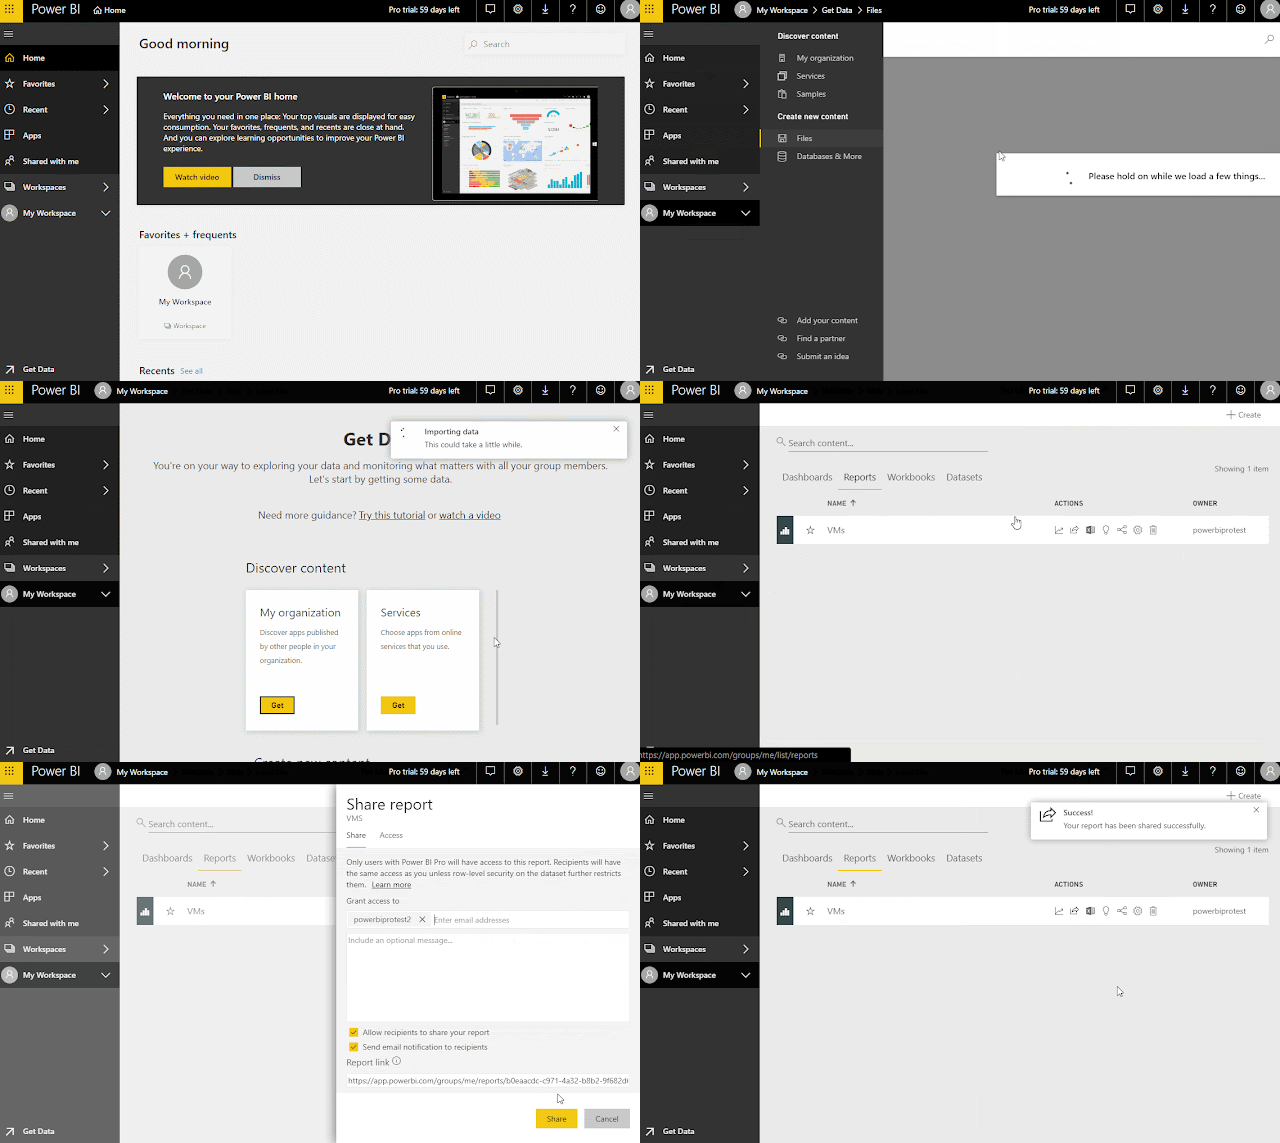
Arguably the simplest method of sharing content is to share it directly from your Personal Workspace. In the GIF below I demonstrate this process with my test content producer account. Note that at the end of the animation the content producer uses the "Share" button to share the newly created content with the content consumer.
Content Producer View
In the next GIF I show the end-user experience from the perspective of the content consumer. If you watch carefully you will see that the content is available to the consumer via the "Shared with me" menu item on the left hand navigation pane.
Content Consumer View
While this method of sharing is very simple and straight forward I strongly advise you NOT to use it. It practice, this method should not be used it for anything other than throw away "sandpit" activities within your organisation. This method has a number of significant drawbacks including:
- you can only provide "read" access NOT read/write. Therefore you cannot easily re-assign ownership or support and maintenance responsibility;
- if a user leaves the organisation the content may be orphaned or lost; and
- the content cannot easily be moved into a shared App Workspace and the content CANNOT be assigned to premium or dedicated capacity
For these reasons please avoid sharing content directly from Personal Workspaces. Ideally, this kind of content sharing would be strongly discouraged via an organisation-wide policy.
"Please avoid Sharing of content directly from Personal Workspaces"
(B) Sharing Method Two: Sharing from an App Workspace by adding users to the Workspace
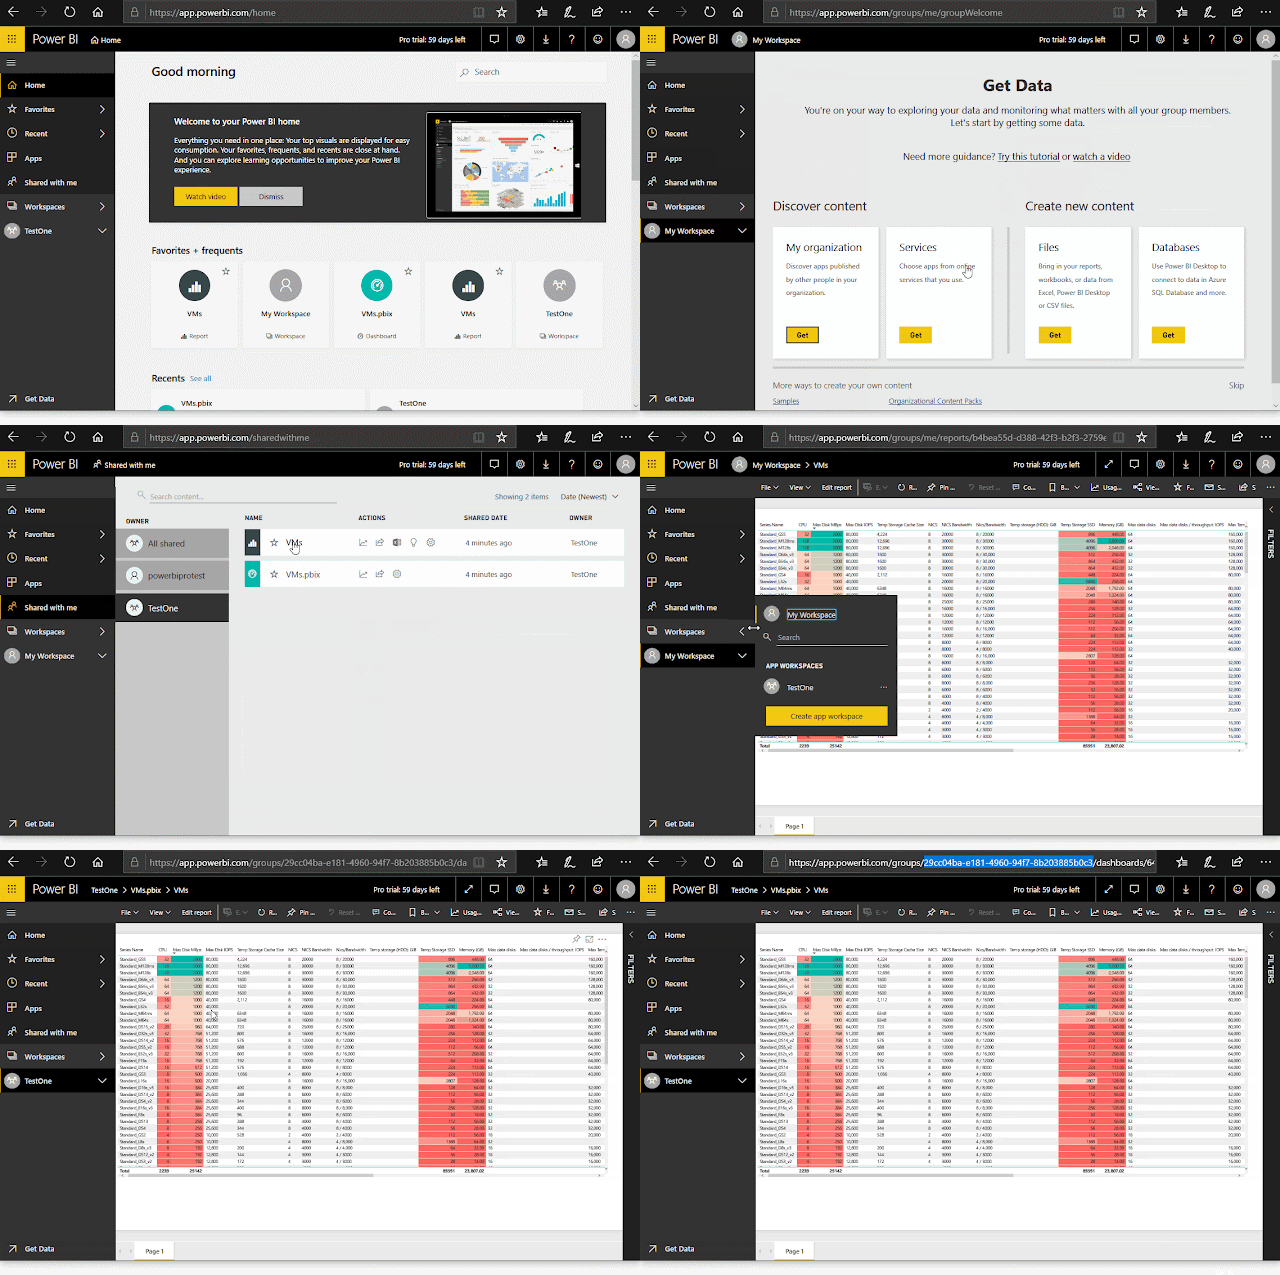
The GIF below demonstrates the process of content sharing by adding a user as a member in an App Workspace. In the animation the content producer explicitly creates the App Workspace before creating content by uploading a ".pbix" file. Once the content is created the content producer then uses the "Access" button in the Workspace to add the content consumer as a member.
Content Producer View
In the next GIF I show how this new content looks from the information consumer's perspective. As demonstrated in the GIF, the content can be accessed from two areas of the consumer's navigation pane. It can be reached from the "Shared with me" section and it can also be reached from the "Workspaces" section by selecting the relevant Workspace. Note the slightly different URL's that result.
Content Consumer View
While this method will allow the consumer to view the associated content I would strongly advise that you do not use it as a mechanism for sharing. This method of providing access to a Workspace is intended to be used for the purposes of collaboration and co-authoring during the content creation process it is not intended to be a mechanism for sharing to read-only end-users.
By adding people to a Workspace you can enable them to co-author and manage the content. This means that they will be able to support and maintain the content should you be unavailable for whatever reason.
It is very important to note that sharing using this mechanism will require the recipient of the share to have a Power BI pro licence. This will remain the case even if the Workspace has been assigned to premium capacity. Remember, the ability to add members to a Workspace is intended for co-authoring and co-management so the Power BI Pro license requirement makes sense.
(C) Sharing Method Three: Publishing an App
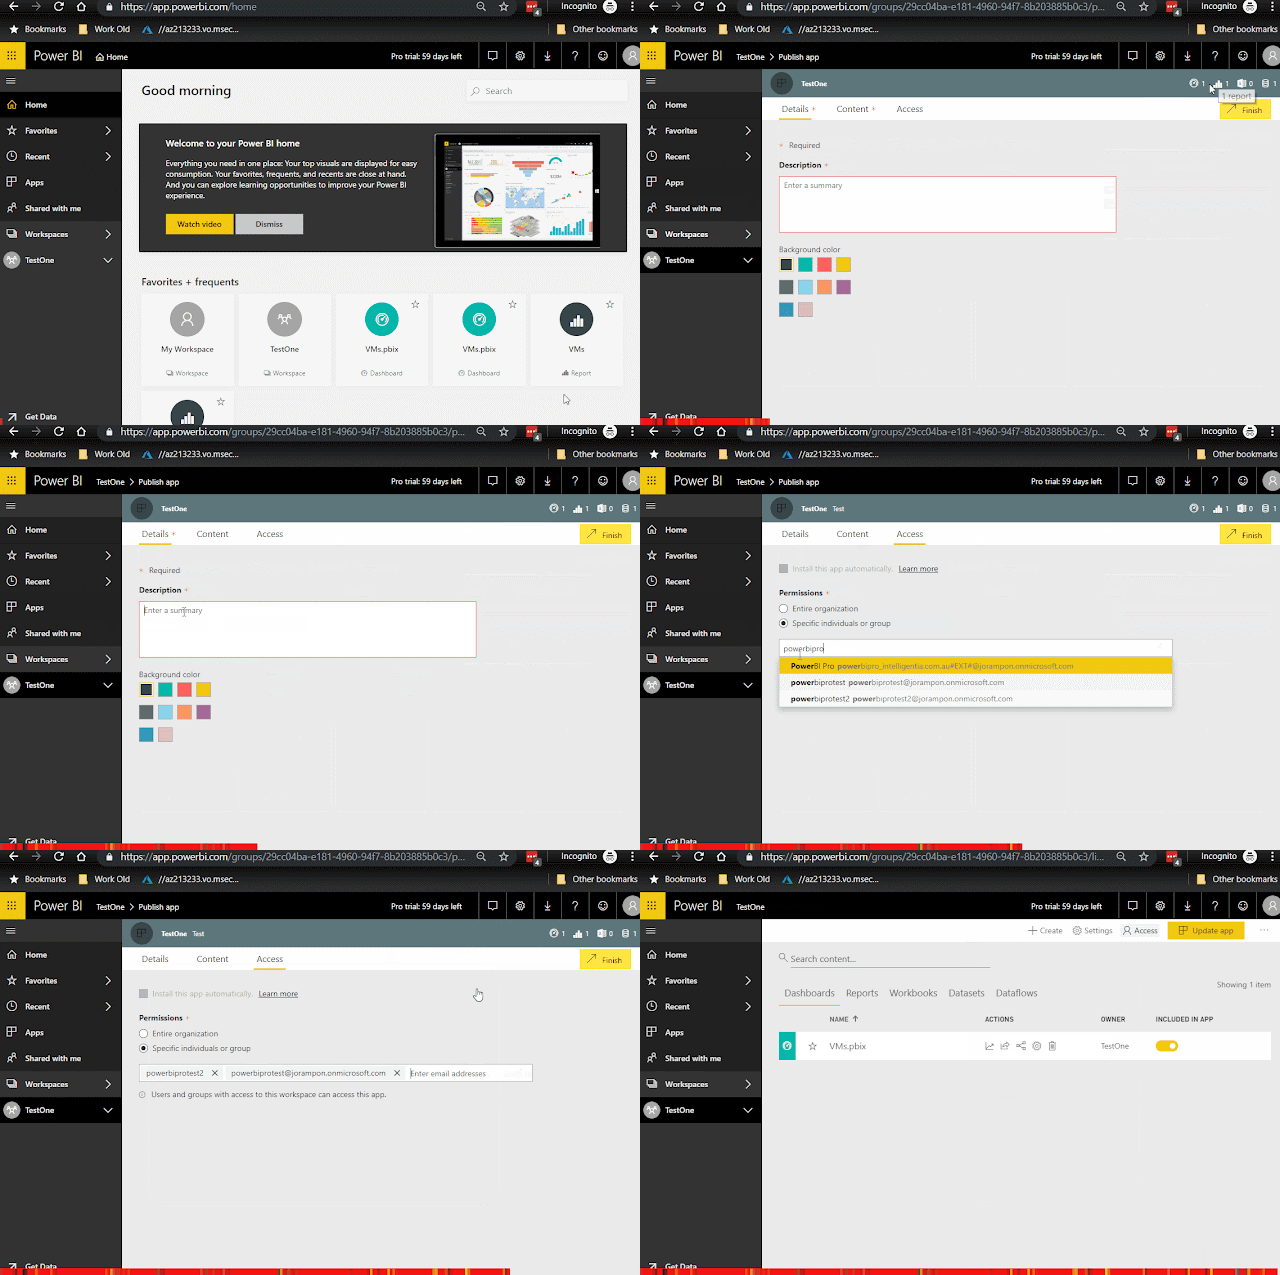
This final method of sharing is very similar to method two. Using this method the content producer creates the content within an App Workspace but instead of adding the consumers as members of the Workspace they instead "Publish" the app to the users. Take a look at the GIF below to see how this is done. If you look carefully at the end of the animation you will see that the consumer's Workspace membership which was previously granted during Method Two is now explicitly revoked.
Content Producer View
Take a look at the next GIF below to see how this new content is now surfaced to the consumer via the "Apps" section of the navigation pane. If you look carefully you will see the unique URL with "app" as part of the path.
Content Consumer View
This is the ONE and ONLY method of sharing that I would recommend that you use within your enterprise. Using this method has a number of benefits including:
- The ability to control when a version of your app is "pushed" out to production, and
- The ability to flip to a capacity based licensing model (eg. Power BI premium) at the flick of a switch.
When this kind of content is assigned to premium capacity then end users to which the App has been published DO NOT need a Power BI Pro license in order to view and interact with the content.
"Sharing content by PUBLISHING an App is the only sharing mechanism that I would recommend."
Now before we move on to the next section of this post a quick word of warning relating to the publishing of Apps. The mere act of publishing an App does not by default "install" the app to the user. By default, the user will receive an email containing a link to the app. By clicking on that link the app will be "installed" and from that point it will show up in the user's "Apps" section of their navigation bar. If you would like the App to show up automatically without the user having to explicitly click on the link then you will need to Auto-Install the App on the user's behalf.
Auto-installation needs to be enabled by a Power BI administrator at the tenant level. See the GIF below for an example of how this is done.
Activating Auto App Installation at the Tenant Level:
Once enabled at the tenant level you will be able to select Auto-install during the publishing process.
Auto-Installing an App


Comments
Link here"
Powerbi Read Soap